Vehicle Graphics with Digital Magic Signs
You’re thinking about getting your vehicle wrapped. Whether for your business or personal use, driving around Orange County for 8 hours gives a lot of exposure: approximately 15,000 – 35,000 potential consumers per day. So what does vehicle-wrapping entail? I sat down with Anto Rayan of Digital Magic Signs to ask how they’re made, and more about the steps of this process. His impressive resume includes 15 years of design experience with commercial vehicle wraps for a diverse spectrum of clientele.
Step 1 – Proper Identification of Vehicle
“The very first step is to identify the vehicle we are working with. I’ve had jobs involving trucks, SUV’s, vans, trailers, exotic cars, boats, you name it… there’s more to ‘wrapping’ than people realize and this is what I’d like to shed some light on.
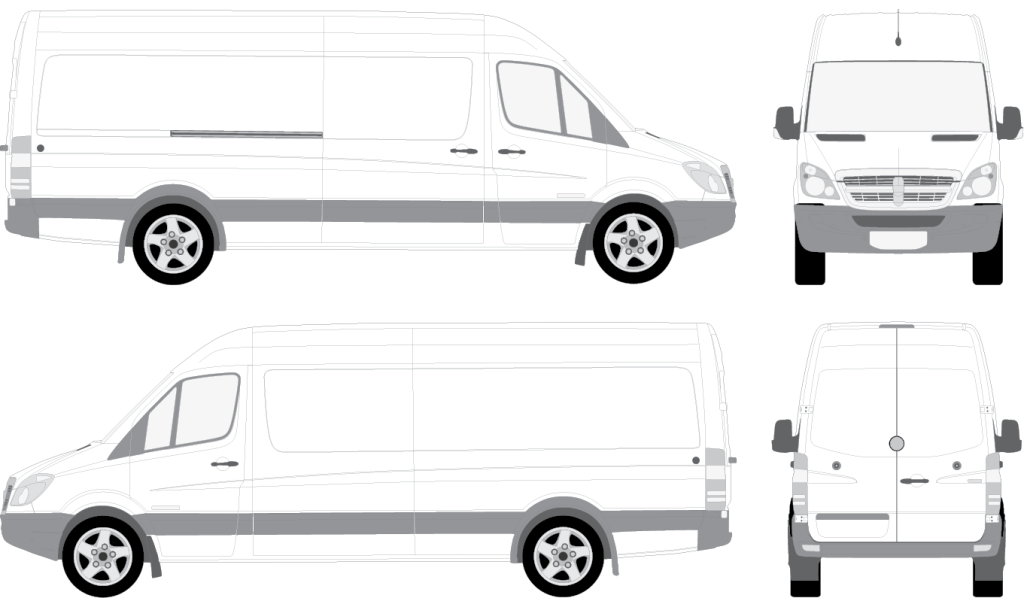
When I say identify the vehicle, I mean make, model, year, number of doors, trim package, custom fabrication… anything that could affect the design and application. This step in the process is most crucial so I’d prefer to receive a picture from the client ensure the accuracy of work and from there, we use or generate a vector-based template that we can use as a proof for the design to show our clients”
Step 2 – Design
“Now that I know the exact vehicle we’re working with, we will find or generate a template to give me the exact measurement and specifications for a specific make and model. All vehicle-templates we use for design are vector-based that allow scalability without loss of resolution. Whether we are creating artwork or adapting our client’s designs, we ensure their expectations are in line with the final product so we provide an artwork proof for their approval and will edit the design until the client is completely satisfied. Our proofs also act as spec sheets not only to illustrate the design we have conceived but they also specify which graphic & print films we use along with their laminates and adhesives. We want to ensure that the customer knows exactly what they are receiving and how long their graphics will last for.”
Step 3 – Production
“Once the artwork is approved, we scale the rendering to the actual size and we put the artwork into print. Every vehicle wrap must go through a 3-step production process:
Printing: Vehicle wraps are printed not in the silhouette of the vehicle but as a rectangular shape. Our template is 2D, it doesn’t account for the natural curves of vehicles so we include 2-6 inches of bleed or overprint to cover for this, also known as the bleed.
Lamination: Once the graphics are printed, we allow the prints to dry from 12-24 hours to ensure the inks have been properly cured which promotes longevity of the colors. After the prints have dried, we use a laminating film which protects the graphics for minor abrasions but more importantly, provides UV protection to slow the aging process of printed media.
Trim: The final step in production is to trim the excess vinyl off and ensure the panels are cut clean which is vital when matching two panels of a design together.
Step 4 – Vehicle Prep
Before we start cleaning the vehicle, we typically remove all emblems and lettering from the vehicle along with door handles, mirrors, and vehicle grills. We remove these vehicle features instead of cutting around them for two reasons: the final product is more aesthetically pleasing & it helps the lifespan of your wrap due to vinyl recession which is physical characteristic of PVC-based films that shrink over time.
The vehicle must be washed with a quality detergent and thoroughly dried with micro-fiber cloths. The lightly rubbed down with denatured alcohol to completely remove debris and dust. This is crucial to help lengthen the life of your wrap. Debris causes visual imperfections through the vinyl and contaminates the adhesive, affecting its ability to remain adhered to the surface. All contours and convex channels of the vehicle may be treated with a primer such as 3M 94 primer which promotes adhesion. Once we complete all these steps, the vehicle is ready for installation.
Step 5 – Application
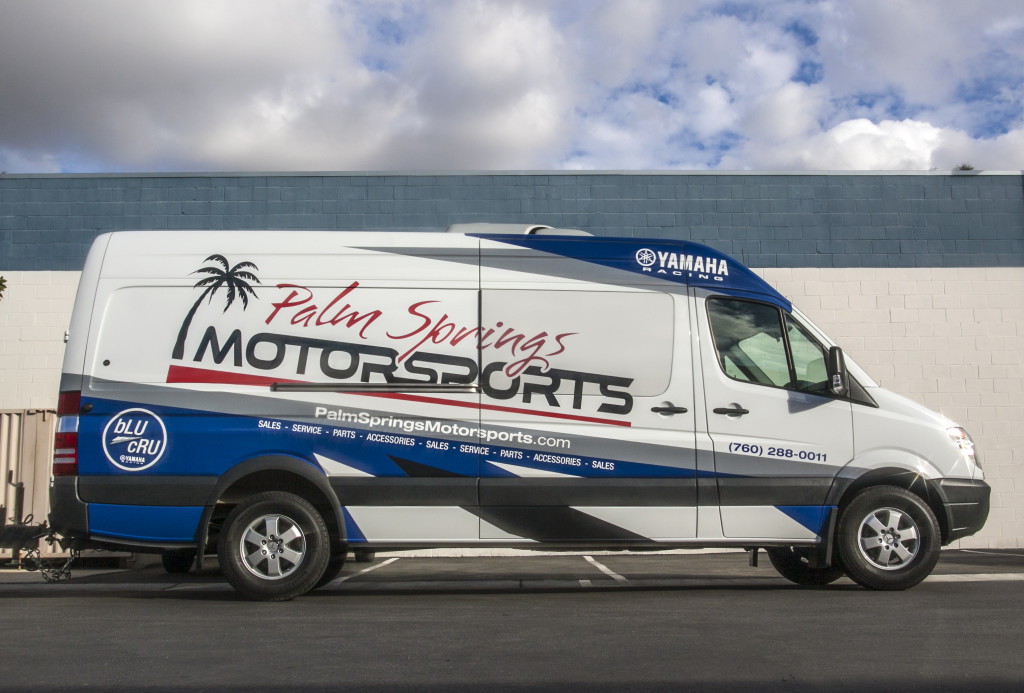
“Whether you are getting a quarter wrap, half wrap, or full wrap, the process is mostly the same. You take the large panels, basically giant stickers, and use a heat gun to stretch and shrink the vinyl to the surface. This takes varying levels of skill, depending on the shape of the vehicle. We receive a lot of Mercedes Sprinter Vans and box trucks which are primarily flat sides with minimal contours however we have done all types of vehicles from commercial trucks to exotic vehicles. It takes a lot patience, skill and attention to detail to obtain a smooth application for vehicles of this nature. We use only premium graphic films at Digital Magic Signs such as ControlTac which is one of the most expensive films however it allows for a better application that promotes longevity as well as ease of removal once our clients need new graphics. After application is complete we put the any removed parts back onto the vehicle and wipe it down. After a final quality check, the job is complete.”
Step 6 – Maintenance
This isn’t a step so much as to have the knowledge of how to care for you vehicle wrap. Wash it regularly, limit its time in direct sun, and treat it with a non teflon based wax. With 3M’s Controltac,Digital Magic Sign’s expert installation, and these care instructions your vehicle wrap should last for years.
When considering another form of advertising, vehicle wraps seem to be the new way to go. Less expensive than billboards, more effective than print advertisements–it has the ability to turn heads on the road and draw in customers immediately and costs less per impression. Digital Magic Signs has wrapped thousands of vehicles locally in Orange County but also around the nation and have the experience and creativity to get your business noticed!


